How To Set Up Call Hunting: Step By Step
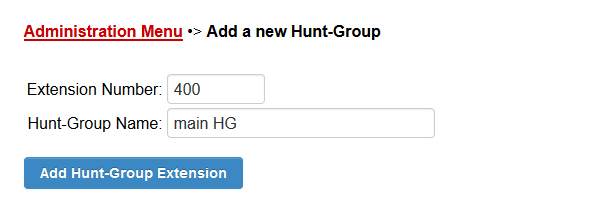
To setup a new Hunt Group, sign in to your VoIP online control panel and click on the “Add new hunt group” button. You’ll then see the below window in which you’ll choose on what extension the hunt group will be activated and the name of your hunt group. Then click “Add Hunt-Group Extension” button.
To proceed with setting up the Hunt Group, click the “Edit This Hunt Group now” button. You’ll then see the below window in which you’ll be able to setup the first extension number to be used in the sequence and adjust the number of seconds of desired ring time. Once you’ve filled the needed information, click “Add Extension to Hunt Group” button.
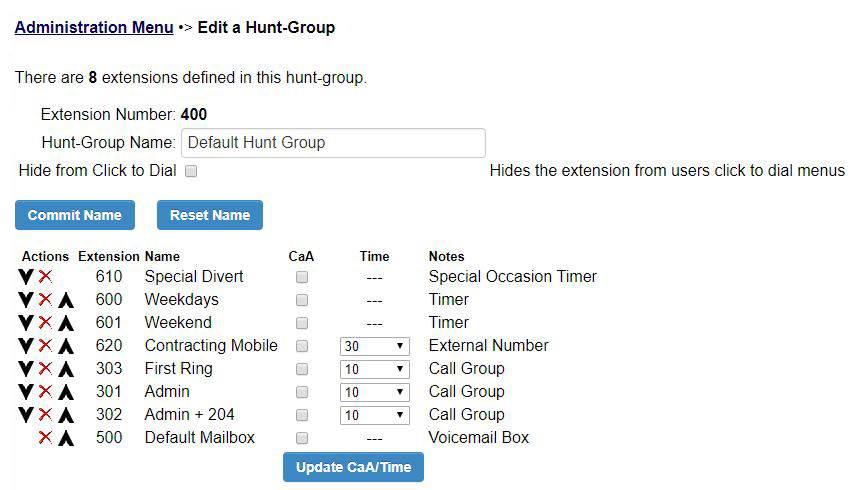
Here is an example of a completed Hunt Group.
When you reach the last extension in the sequence you’ll find three choices at the bottom of the page:
Repeat: Means that the call will be transferred again to the first extension on the list and repeat the sequence.
Return Busy: means that the caller will hear a busy message.
No action: means that the call will end here.
Once you’ve made your choice, click the “Update Hunt Group” button.
You can edit this Hunt Group at any time and use the small arrows next to each extension in the previous window to change the hunt sequence. You can also change the time interval between the extension numbers in the sequence.
Learn more about VoIP call hunting feature.
If you need more help in setting up the Hunt group, call one of our experts: 03300881394

